
For quite some time we wanted to be able to securely access our on-prem services, such as local NAS, IoT hub and Grafana. We have tried setting up PPTP but quickly realised that the technology has been long compromised. IPsec would be a great option, but it requires both ends of tunnel to have static IP addresses.
OpenVPN and AWS
Theoretically we can simply spin up an EC2 instance from the marketplace or even configure it manually, but we were feeling adventurous.
Setting up Client VPN Endpoint on AWS effectively stands up managed OpenVPN instance. We ended up not going with it (and we’ll get to reasons in a few moments), but let’s quickly go through steps one would need to take to pull it off. The setup is fairly complex and involved:
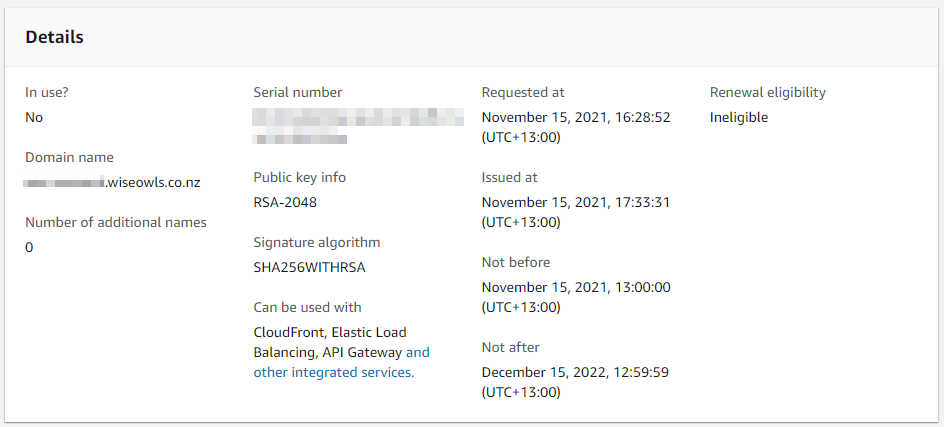
- Set up server certificate in AWS Certificate manager. Public certificates are free, but we had to go through DNS-based ownership validation, which is not that hard but takes anywhere between 15 minutes and few hours and we were not planning to use that domain name to connect to our server anyway.
- Make sure to pick up IP range that’s big enough (at least /22) and does not overlap with given VPC
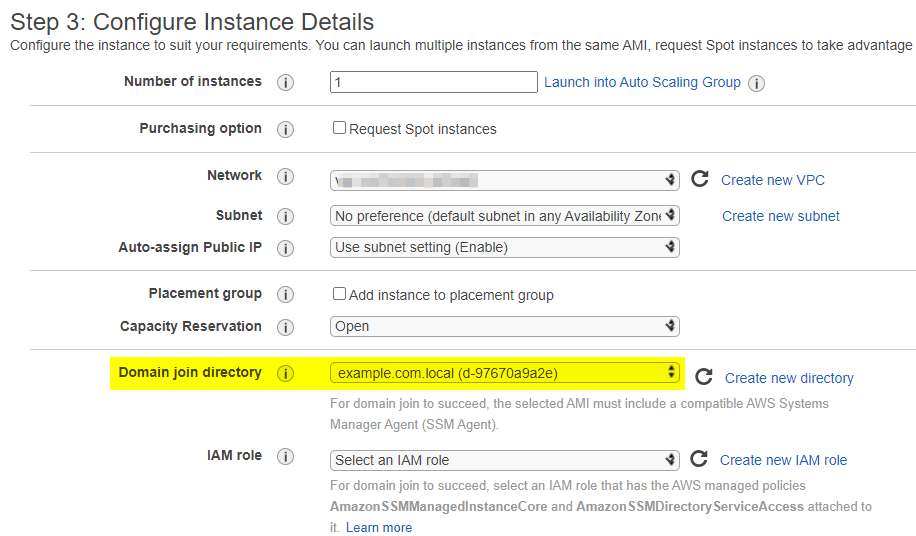
- Stand up some sort of Directory Service for user authentication. Cognito is not an option, and we don’t have AD readily available. Creating full fat AD just for VPN seemed overkill, so we created Simple AD (which is still surplus to needs). It would’ve been fine, but to manage it, we had to stand up a Windows EC2. We of course joined it into the domain. And this stage it became obvious, that creating a virtual EC2 appliance would probably be way easier, but we decided to proceed for the sake of science.

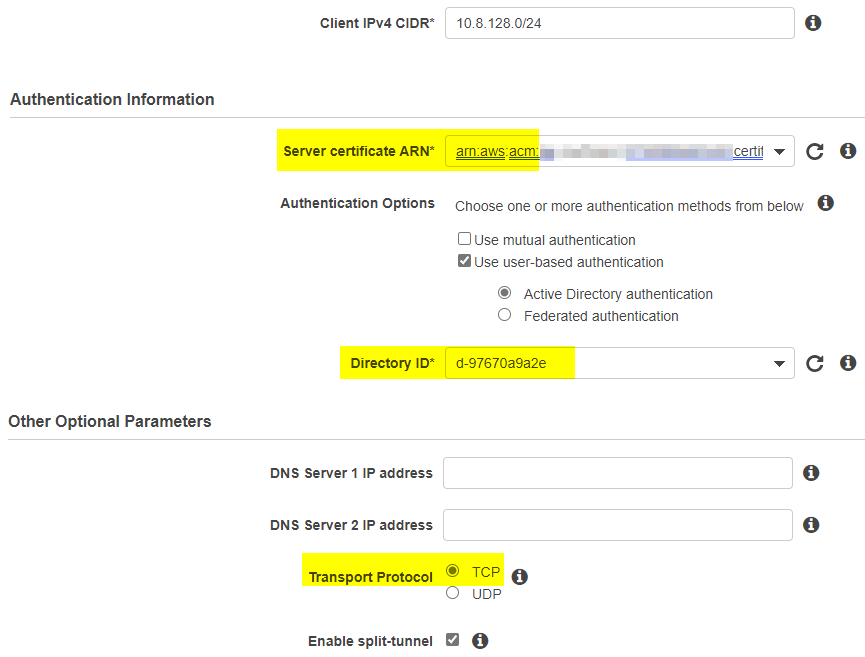
- Finally, coming back to VPC we created a Gateway and VPN itself. One thing to keep in mind here is Transport protocol: Mikrotik only supports TCP. Yuck.
- All we have left to do now would be to download
.ovpnfile and use it to set up our router. But unfortunately, this is where our shenanigans will have to stop: RouterOS does not support AES-256-GCM.
L2TP scripts
Since we were standing up compute resources anyway, our goal shifted towards finding the easiest way to set things up. And IPsec VPN Server Auto Setup Scripts delivered just that! Just running wget https://git.io/vpnquickstart -O vpn.sh && sudo sh vpn.sh on a fresh EC2 instance did the trick for us. One thing to remember is to save auto-generated credentials the script prints on exit – that’s almost all VPN server setup done.
Since we had a router on the other end and wanted access to internal resources, we had to log in again and add couple of routes into /etc/ppp/ip-up.local:
#!/bin/bash
/sbin/route add -net 192.168.99.0/24 gw $4 # see for parameters: https://tldp.org/HOWTO/PPP-HOWTO/x1455.html
We also wanted to use conditional routing on the client side and only route certain client machines through the tunnel. For that, /etc/sysconfig/iptables needed a little update:
# Modified by hwdsl2 VPN script
*nat
:POSTROUTING ACCEPT [0:0]
# autogenerated code here
-A POSTROUTING -s 192.168.99.0/24 -j MASQUERADE # adding our own network so it gets NATted

COMMIT
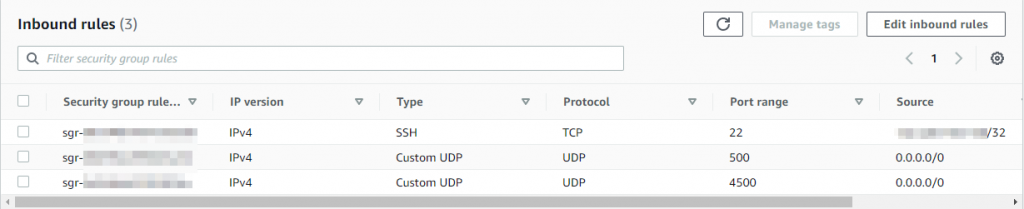
Finally, we needed to enable L2TP through AWS NSG:
Mikrotik setup
With WinBox, setting up VPN in RouterOS is pretty straightforward:
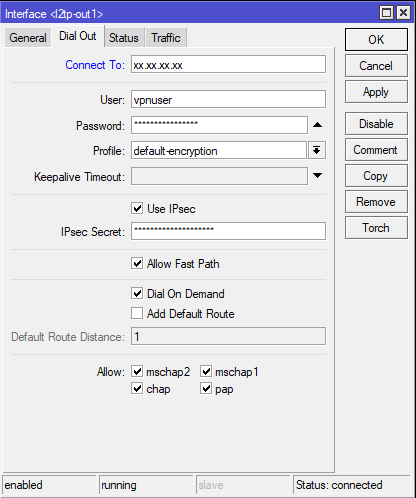
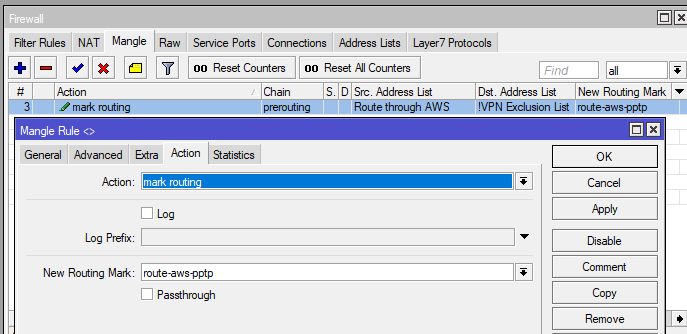
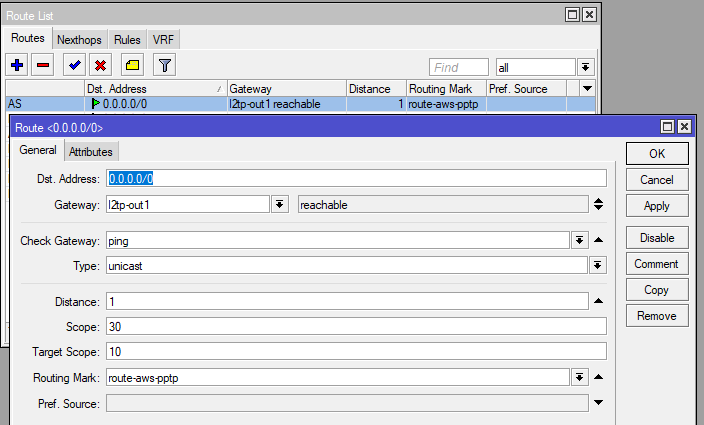
you may notice we opted to not use the VPN as default route. This solution comes with tradeoffs, but in our case, we wanted to only tunnel specific clients. For that we have set up policy routing. Added a Mangle rule where we mark all connections from chosen hosts and then assigned new routing table to these packets:
Conclusion
It is a bit unfortunate that in 2021 Mikrotik still does not properly support OpenVPN. On the other hand, it exposes a lot of configurability to cater for uncommon network layouts. And now we got a bit closer to realising its full potential.