We have discussed some high-level approach differences between Azure and AWS with regards to Lambda.
This time round we will expand on our scenario a bit and attempt to get our static site to call a serverless endpoint.
This article aims to cover brief step by step process of creating a simple backend for our static website to call.
There are a few things we’d have to keep in mind while going through this exercise:
- no custom domains – setting HTTPS up with our own domain is a whole different topic – watch this space
- even though we primarily develop on .NET platform, we’d resort to Node.JS here. Main reason for this choice being – inconsistencies between platform features: for example, cloud console built-in editor is only available for interpreted languages with AWS, while with Azure, .NET is a first-class citizen and gets full editing support.
- no CI/CD – we want something very simple to get the point across.
- online portal only – again, it’s best practice to codify infrastructure and deployment, but we set something up quick and dirty. Think Startup Weekend
Hosting static website on AWS
Starting with the frontend, we’d throw a small front page up into the cloud. Upload the files to S3 and make sure to enable read-only public access to the files in bucket as we’d not go through more fine-grained ACLs here.
Creating a quick Lambda
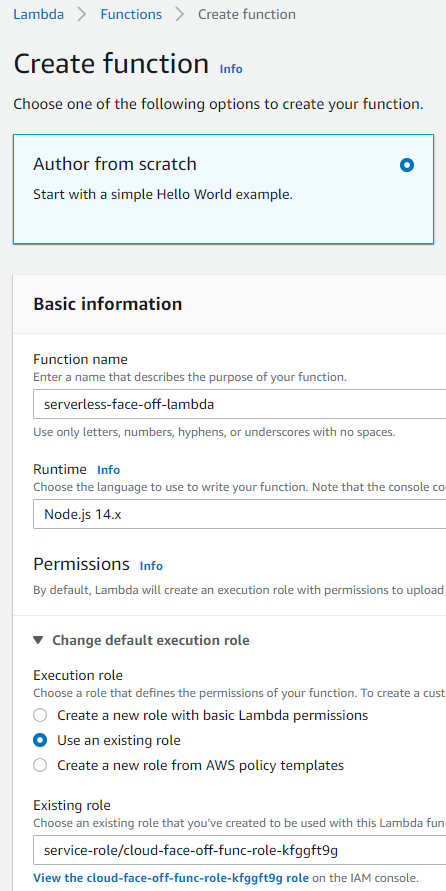
Now onto the main attraction. We’d head over to Lambda and proceed to “Author from scratch”. As we’ve already established, choice of runtime would impact our ability to move quickly and code it on the portal. So, we’d venture onto totally unknown Node.js territory here.
To get a response we need to define a function named handler and export it. In fact, the name is configurable, but we’ll stick to the default.
Since we don’t need to change a lot, here’s our complete test code:
exports.handler = async (event, context) => {
const response = {
statusCode: 200,
isBase64Encoded: false,
body: JSON.stringify({event, context}),
headers: {
"Content-Type": "application/json",
"Access-Control-Allow-Headers" : "", "Access-Control-Allow-Origin": "",
"Access-Control-Allow-Methods": "OPTIONS,POST,GET"
}
};
return response;
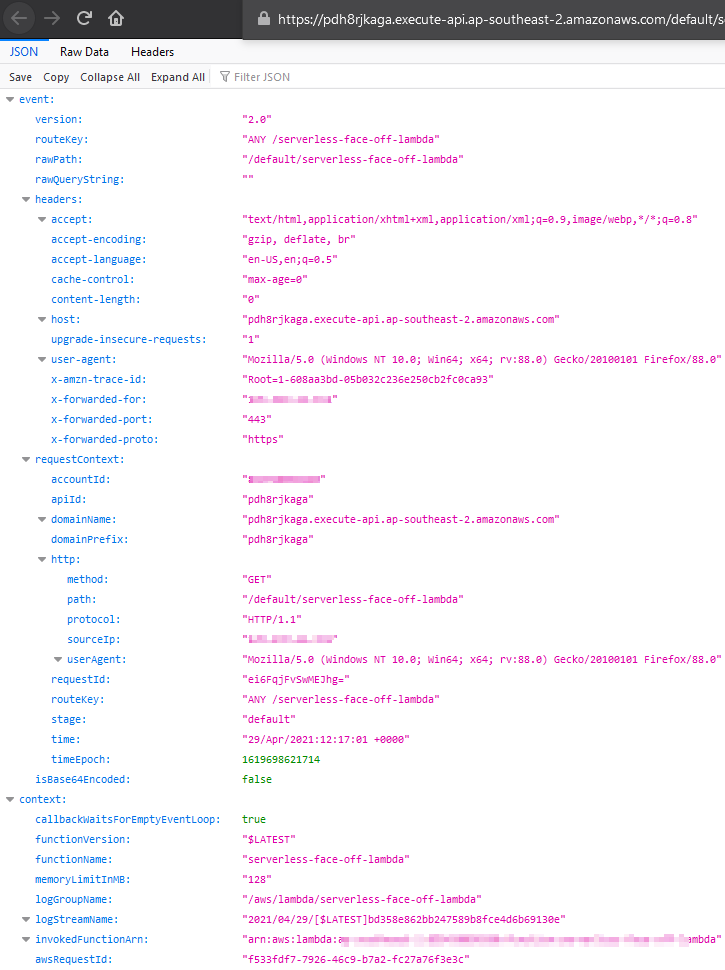
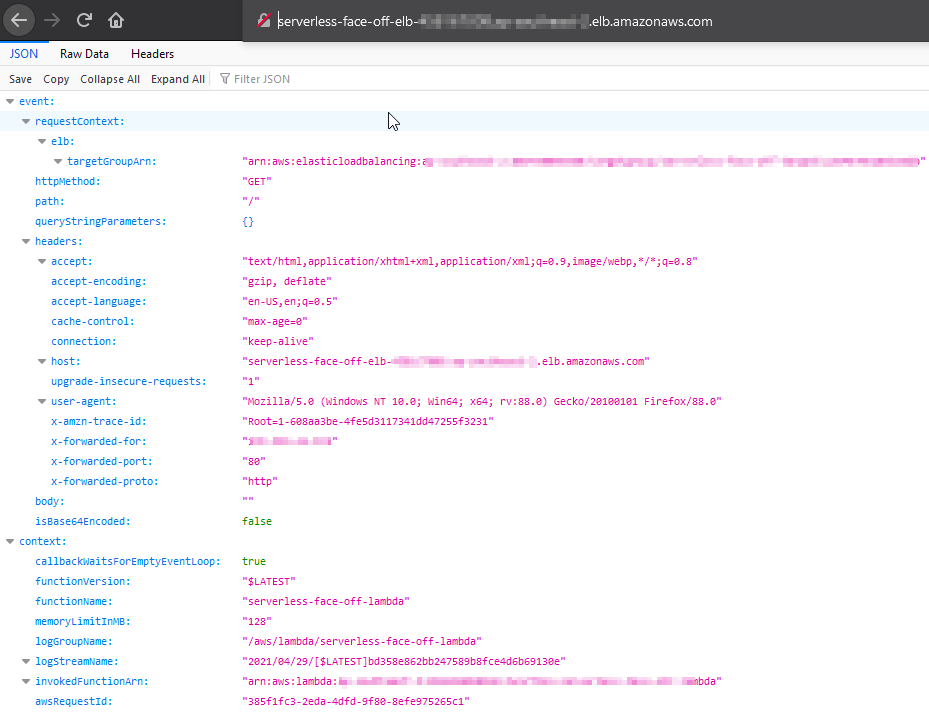
};Notice how we add a bunch of headers for CORS? Well, that’s a requirement for ELB to work. Can skip it if going API Gateway path. Deploy it, and let’s move on to defining how our function can get called.
Defining a trigger
There quite are quite a few ways this function can get invoked, but we only care about HTTP. Two obvious options for this would be to either stand up an API Gateway or use Elastic Load Balancer. Shall we try both?
API Gateway
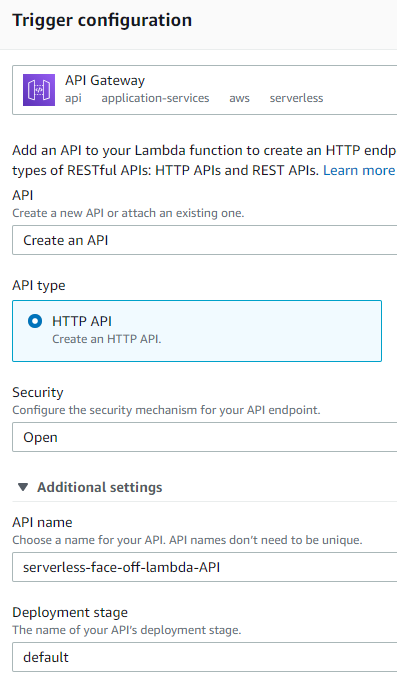
API Gateway has been the preferred method of fronting lambdas since the beginning of time. It supports authentication and allows great control over the process. Since API Gateway is specifically designed to serve HTTP requests and forward them along, we only need to make a few choices like
- whether we want full control over REST or simple HTTP will do and
- what kind of authentication we’d like on the endpoints.
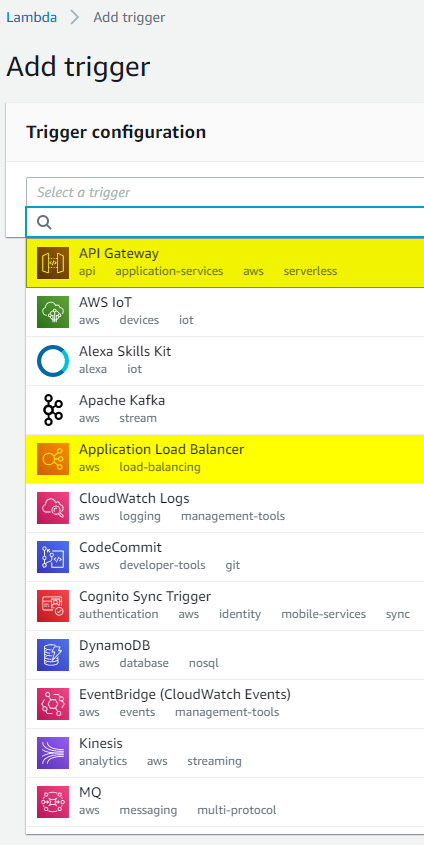
Elastic Load Balancer
As of late 2018, AWS also supports a more “lightweight” option of having ELB target a lambda when called on a predefined path. On the surface setting up ELB looks more involved as we’d have to configure a lot of networking. Don’t forget to open inbound port 80 in your security group!
-
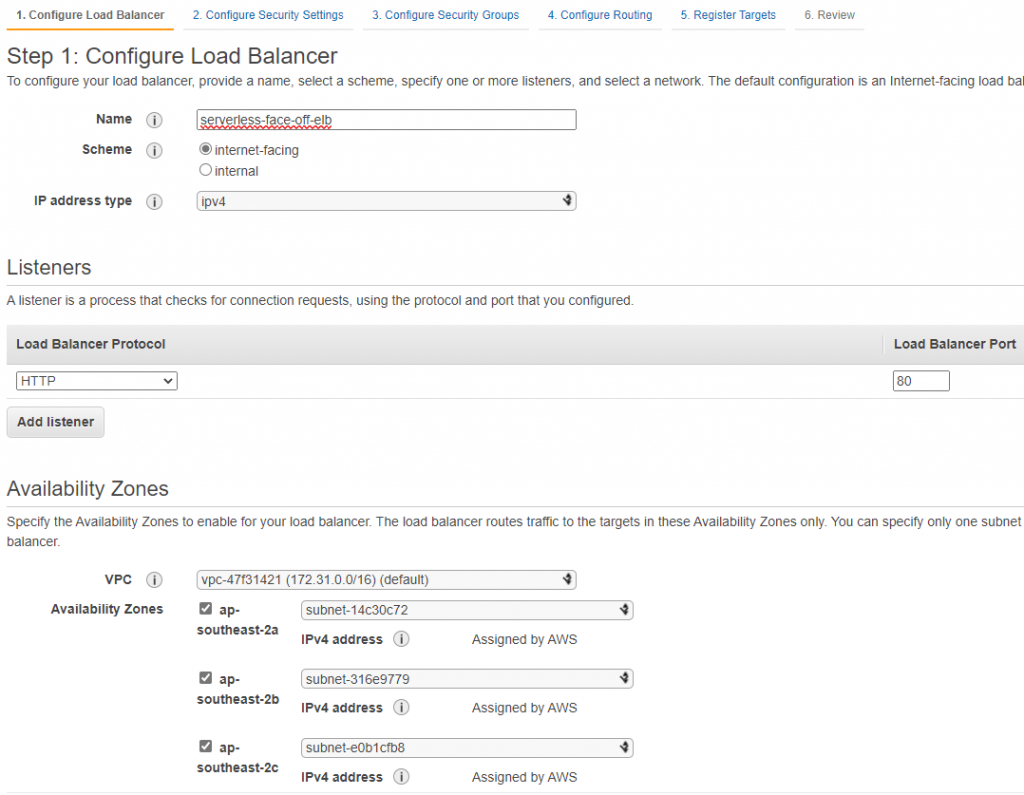
Networking -
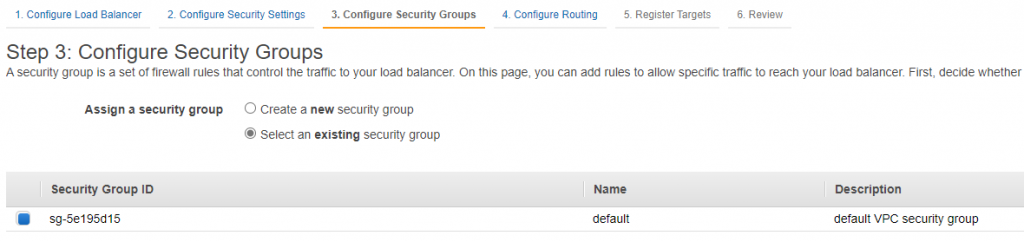
Security Group -
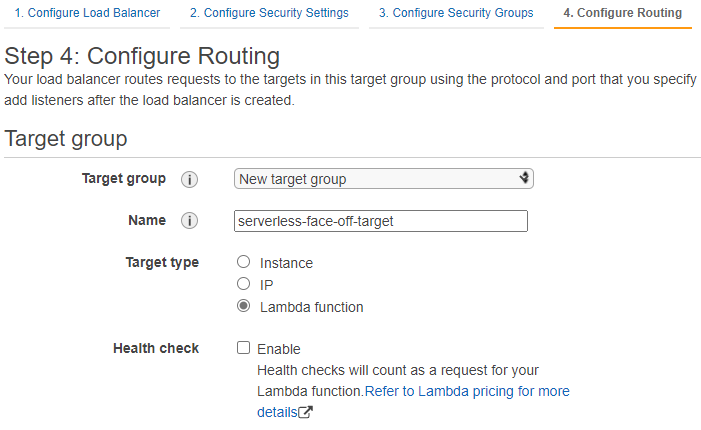
Target -
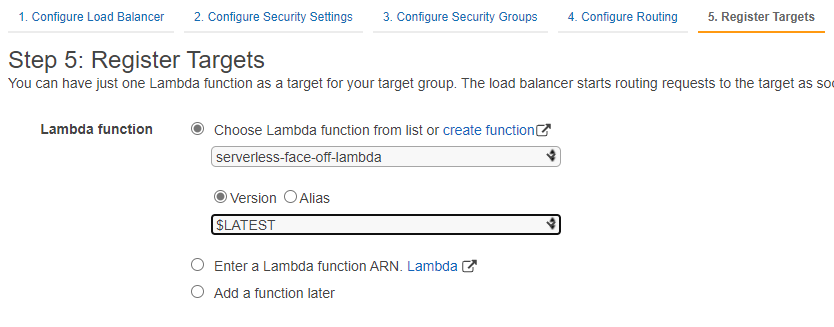
Lambda
Conclusion
Creating a lambda with AWS is extremely easy if you pick the right runtime. A choice of triggers makes it a bit harder to pick one that suits better. Here’s a list of points to consider:
| API Gateway | ELB | |
| CORS | yes, can edit on the portal | no, but need to modify lambda to return correct headers |
| SSL | HTTPS only | HTTP/HTTPS or both |
| AuthN | yes (IAM) | no |
| Throttling | yes | no |
and sample responses FYI: